


How to install a portable microphone? iMic User Manual!
PALOVUE is quite famous for the classic wired earphones with lightning connector, now, to bring our pursuit for music to the next level, iMic is created to provide a wonderful recording experience. As a portable microphone, iMic is easier to be carried around, more convenient than the condenser microphone you can find on market. Two microphone charcoal boxes are arranged in a mid-side configuration, providing adjustable stereo, suitable for capturing various audio sources, including music and voice. Let's take a deep look at this small figure masterpiece.
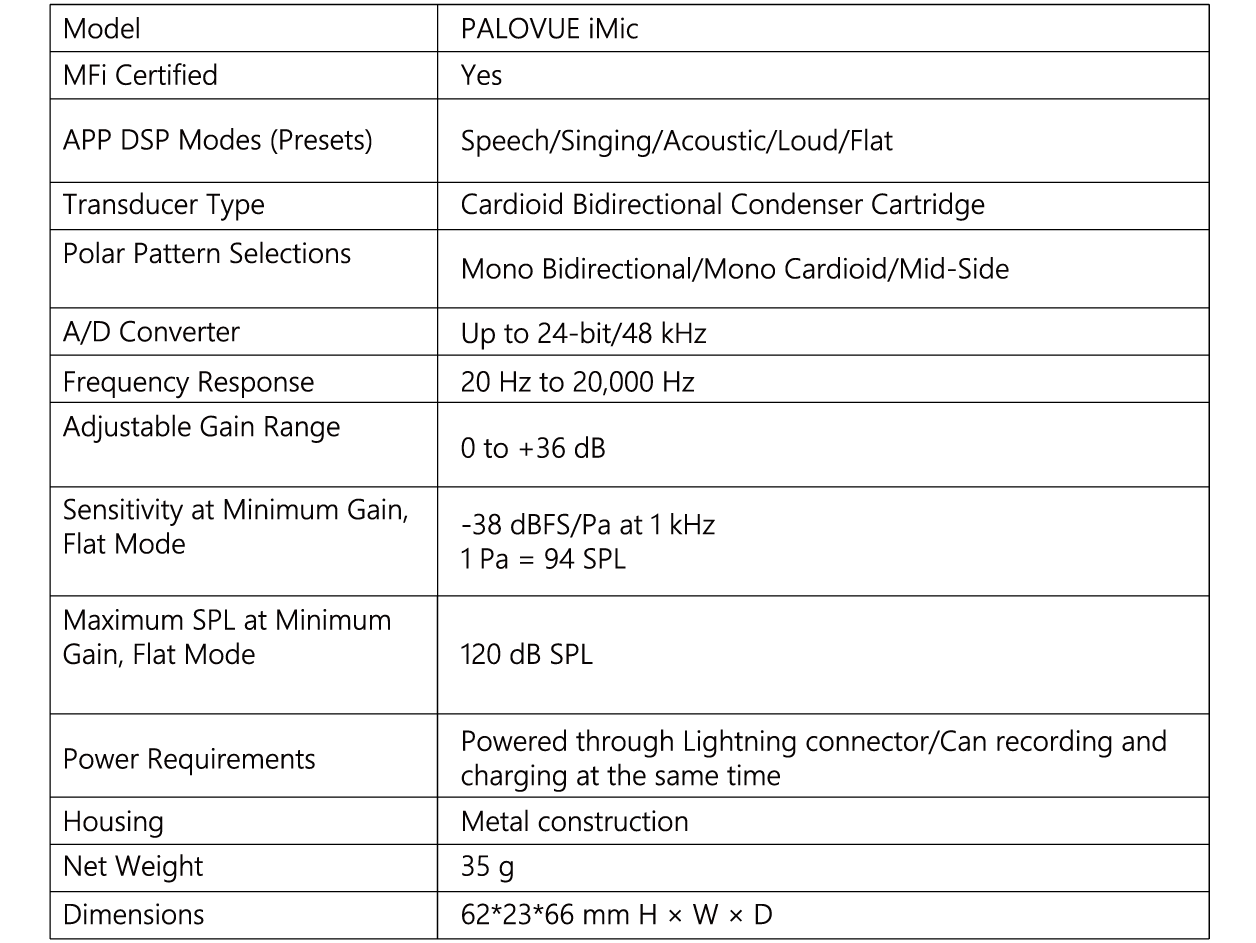
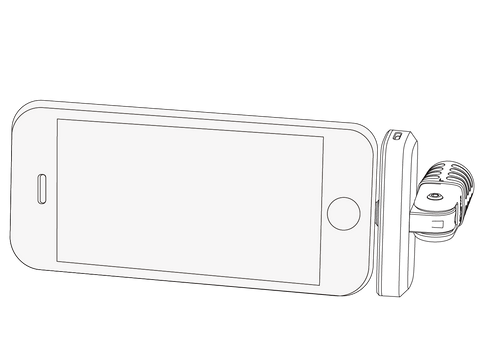
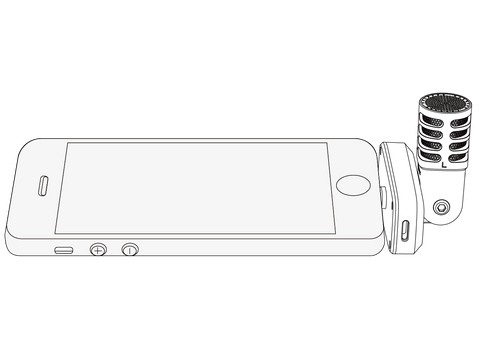
PRODUCT DESIGN:

PRODUCT SPECIFICATION:
QUICK SETUP
PALOVUE iMic is compatible with mobie devices that have a lightning connector.
1. Plug the microphone into the lightning connector on the iOS device.
NOTE: the reversible lightning connector allows the iMic to be installed in either orientation.
2. Install and open the PALOVUE APP.

PALOVUE APP controls the microphone. Here are two ways to download the APP.
Directly scan the QR code below or search for "PALOVUE" in the app store to download.
3. Check audio and adjust settings with the PALOVUE APP with the iMic settings.
Select a preset mode or manually adjust microphone gain and stereo width to optimize audio recordings.
4.Set your device to Airplane Mode and Do Not Disturb before recording.
This allows you to record audio with no interruptions from phone calls or app notifications.
5.Use the third party recording app to begin recording.
Use the third party recording app on your device to begin recording.
The microhpne retains all settings from the PALOVUE APP Adjustments can be made while recording, but to avoid audible artifacts, test setings prior to recording.
ALIGNMENT MICROPHONE
This section suggests microphone placement for typical use cases. Keep in mind that there are many effective ways to record a given source. Experiment with microphone placement and settings to find what works best.
Audio Recording
The phone or tablet can be used in any position. Aim the front of the microphone towards the source, with the left and right sides facing the appropriate direction.

Portait(Vertical)
Aim the front of the microphone towards the source. The microphone can be mounted in either orientation of iMic with the lighting connector, so ensure that the lest and the right sides are facing the appropriate direction.

Landscape (Horizontal)
Aim the front of the microhpne towards the source. The microphone can be connected in either orentation with the lightning connector, so ensure that the left and right sides of the iMic are facing the appropriate direction.
Audio Interview (Tabletop)
Set the recording device on a flat surface with one side of the microphone pointed towards the subject and the other pointed towards the interviewer. Select the MONO BIDIRECTIONAL preset in the PALOVUE APP.
Video Interview
To capture the voices of both the subject (on-camera) and the interviewer (off-camera), select the MONO BIDIRECTIONAL preset in the PALOVUE APP. Position the microphoen with the left and right sides facing each person.

Self-Recording (Voice)
Set the device on a flat surface and angle the microphone towards your mouth. Selet the MONO CARDIOID preset in the PALOVUE APP to reduce ambient noise.
PALOVUE iMic APP adjusting the microphone
1. Input Meter
Display the strength of the input signal. The loudest peaks should reach within in target range (indicated by the shaded region).

2. Microphone Gain
Adjust to match the volume of the sound source. Monitor the meter when making adjustments to ensure levels are in the target range (indicated by the shaded region of the input meter).

3. Customize
First: Save the settings to the customize list, up to 10 customize settings can be saved. when you adjust the gain, channel data or mornitoring data, press the save button to save the data to the surrent customize list. When calling an empty customize, no adjustment is made to the current data. When calling the customize data, set it to the corresponding gain, channel data and monitoring data.
Second: When the rest option is pressed, the gain, the channel data, and monitoring data are restored to the factory settings.

4. Monitor
You can monitor any voice from your headphone by switch the “Monitor” bar.

After turning on the monitoring function, self-excitation or echo may occur. Please lower the Mic Gain or the volume of your iphone or ipad.
5. Preset Modes
Select your mode to set stereo width for specific applications. Refer to the "Preset Modes" topic for more details.


Five selectable modes optimize settings for gain to match your recording needs. Set the microphone level and scroll through the modes to find which sounds best. Then adjust level if needed.

6. Polar Pattern Selection (Stereo and MONO Settings)
The following settings control microphone capsule activity.


PACKAGE CONTENT
- PALOVUE Microphone
- Portable Outer Box
- Dustproof Sponge
- User Manual
FCC WARNING
Changes or modifications to this unit not expressly approved by the party reponsible for compaliance could void the user authority to operate the equipment.
Notes: This equipment has been tested and found to comply with the limits for a Class B digital device, pursuant to Part 15 of the FCC Rules. These limits are designed to provide reasonable protection against harmful interference in a residential installation. This equipment generates, uses and can radiate radio frequency energy and, if not installed and used in accordance with the instructions, may cause harmful interference to radio communications.
However, there is no guarantee that interference will not occor in a particular installation. If this equipment dose cause harmful interference to radio or television reception, which can be determined by turning the epuiment off and on, the user is encouraged to try to correct the interference by one or more of the following measures:
-- Reorient or relocate the receiving antenna.
-- Increase the separation between the equipment and receiver.
-- Connect the equipment into an outlet on a circuit different from that to which the receiver is connected.
-- consult the dealer or an experienced radio/TV technician for help.
Note: If shielded cables or special acessories are required for compliance, a statement must be included which instructs the user to employ them, for example, shielded cables must be used with this unit to ensure compaliance with Class B FCC limits.
This device complies with Part 15 of the FCC Rules. Operation is subject to the following two conditions:
(1)this device may not cause harmful interference, and
(2)this device must accept any interference received, includding interference that may cause undesired operation.
Leave a comment